Showing posts with label 30 Day of Creativity. Show all posts

Monday, July 18, 2011

An easy way to make cute notebooks!

Better late than never I guess.... I am finally getting around to making the rest of my 30 Days of Creativity things before I do the giveaway.

Today I didn't feel like doing anything but I gave myself a kick in the proverbial and made a little notebook. Very simple and a lot of fun. You can get pretty creative with what papers you use but I wanted mine to be fairly minimalistic. (Let's not talk about the mess I made in the spare room while making this little number shall we? Really, I don't know how I do it... this is not a messy thing to do and yet I make it that way... >.< )

Click below for the how to.


Things you will need (and a running commentary on what I used) :
  • 1 x cereal box (or similar weight card)
  • A selection of paper for the inside (you can do whatever you want)
  • 1 x sharp craft knife (sharp is good.. dull knives are the worst!)
  • Some strongish glue (I used Elmer's School Glue - it's pretty strong but can also be pretty wet, so I used a paintbrush to paint on thin layers... which reminds me, better go wash that baby out!)
  • 1 x ruler (I like my metal ruler because I can't accidentally shave some off ;) It has been known to happen...)
  • 1 x Shipping Tag (Optional - I used it as a decorative way to close my book)
  • 1 x Mini Bulldog Clip (Optional - I used it as a decorative way to close my book)

Step 1:
Flatten out cereal box (skip this step if you have flat card)


Step 2:
Measure and mark the size you want your notebook to be. My finished notebook is 13cm by 8cm so I measured 13cm by 16cm (so you can fold it in half to get final size)

Step 3:
Glue something nice on the printed side of the cereal cardboard (unless you want the cereal box look). You can make the brown the inside or outside of the cover, your choice.


Step 4:
Cut the inside pieces to size. As you can see, I chose a range of papers, including some images and lined paper for variety. 

Step 5:
Score the middle of the cover with a bone folder (if you don't have one, use the back of a butter knife like me), and inside papers if you want. I didn't do this but had to go through and fold the papers to make them lay flat after I bound it.
(make sure you score as close to the middle as you can - don't worry too much, you can trim uneven edges off later)


Step 6:
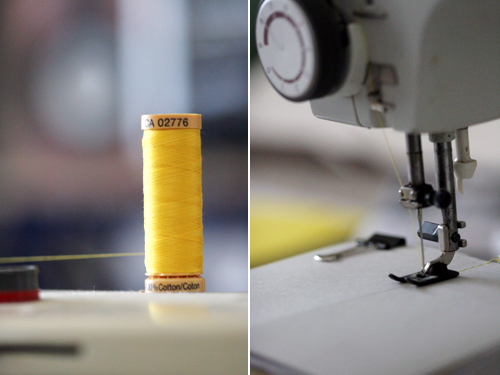
Sew along the score line. I used a lovely yellow thread to go with the yellow I used inside. Get creative, red would be nice, or brown to keep it natural looking.
NB: I didn't use the pedal to sew, instead used the hand sewing wheel option (what is that thing called?!), that way I had more control and less chance of breaking the needle 
(I have broken needles sewing card a few times.. always scary, especially when you are super close to the needle trying to get a good look at what you are doing!)

Step 7:
Once you fold the book in half you may have some of the inside papers sticking out past the cover - never fear, this is where trusty sharp knife comes in! Get your ruler, line it up against the edge of your cover, press down firmly and trim off the edges. 
Please don't cut your fingers off on this step. I didn't take any pictures of this step, I  thought that unwise! (and I don't mean the cutting off fingers step, I mean the other one... the non cutting off fingers one :)

Step 8: Optional Decoration
Take your shipping tag and score two lines wide enough to fold around your notebook - this will vary depending on how much paper you used.

Step 9:
Glue one side to the back of your notebook, somewhere close to the middle(it's not too important - wherever looks good to you)
You could even sew the tag on if you wanted more sewing detail.


Step 10:
Secure with mini bulldog clip 
(I tried to use magnets but didn't have any strong enough. This would be a nice touch if you don't like the bulldog clip)

Step 11:
And you're done! Fill it with whatever your heart desires.. Don't be scared, just do it!


Hope you enjoyed my little tutorial! Ask away if you have any questions and feel free to share this tutorial around, I just ask that you credit my little blog :)

All photos ©FIKS*D

Monday, July 11, 2011

Cool news bloggeroonies


I got featured on the DailyCraft Facebook page which I find a little bit exciting because, really... my blog is not huge! So there's that!

Which brings me to my next point. I'm a little bit sad I missed out on the last days on my 30 Days of Creativity challenge because of being away and I did say I was going to have a giveaway of the things I created... So I think I will try and get some more creations done to make up for what I missed and then put them up for grabs!

I have found that my crafty posts have been quite popular, especially my friendship bracelet! Also, putting my creations up on Craftgawker has brought a lot of viewers, the first time I have ever seen my page views up in the 1000s.. so if you're looking for some more viewers - definitely give that a try!

So, over the next few days keep a look out for my newest creations (I'm thinking handmade journals, paper cutouts, handmade stamps and some photography) and then a giveaway (probably next week some time!)

Wednesday, June 22, 2011

Day 22: Bookmark


My mum bought me some giant sized paperclips and they are perfect as bookmarks. I thought I would pretty one up with a little bow. Very cute & easy!


Day 21: Scratch (but don't sniff)

Yes, I'm still in Australia... boooo! We were meant to fly out this morning but due to ash clouds and the like our plane ride got delayed.... tomorrow we fly! For sure hopefully!! First stop Chicago (technically San Francisco.. but that doesn't count!)


Monday, June 20, 2011

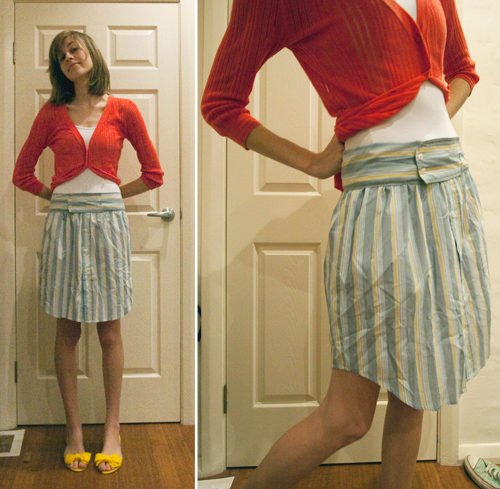
Day 20: Shirt Skirt

Yeow. Today our car caught on fire. Everyone is ok. The car is ok. The battery melted and now we have a new one (battery that is). It was kind of scary....!


So for my creative task today I made a skirt from one of Mr Peck's old shirts. Pretty happy with it, the waistband just doesn't sit flat... grrr, always something!!!

But now I have a new skirt and it didn't cost me a cent.. .so that's pretty cool!

Apology for the photos.. it's dark and cold and  yeh.. .hehe I'll try and get some better ones later.


EDIT: Somehow, I got my numbering all out! hehehe this used to be day 18 - it's now day 20, the correct day :)

Sunday, June 19, 2011

Day 19: Fingerprints!

Hmmm... Feeling very uninspired and didn't do anything yesterday, so bad! I feel like I've cheated, or lost or something! 
And today I'm not really feeling it either.... Although these fingerprint characters were actually pretty fun to do and came out kinda cute. Would be a great activity to do with kids. I pretty much looked at the shape each fingerprint made and drew what I saw in the irregularities. Also a great exercise to develop your creative thinking skills.


Friday, June 17, 2011

Day 17: Sketch


Today I started making my maxi skirt. So far it's oook, I cut the material on the cross so it's a little odd sewing it up but hopefully it turns out. I just have to sew the elastic into the waste band and hem it... I'll try and finish it on Sunday.

In other news... I just squirted a whole heap of moisturizer over my mouse and mouse pad so I have a moisturizer mouse now. That could be a new trend?! Maybe not....

I just did a sketch to show you, it's for my new website that I showed you the other day to go behind the logo. Enjoy :)

Thursday, June 16, 2011

Day 16: Pompom Owl & Shopping overload

Today was a day of shopping and shopping and lots of spending of money which was fun, but not really.
We were getting all the little things that we need for our trip to USA! (yipee, leaving next week) 

I got some material which I'm excited about because it cost me $4 a meter and is so cute! I am planning to make some t-shirts and a maxi-skirt... possibly not before we leave though :( but I will try and at least get the skirt done. The coral will be the skirt and the other two t-shirts... or possibly skirts too. I love stripes at the moment!


I also got some cute shorts from Jeans West that I have been looking at for a while and seeing as it will hopefully be short weather in USA these should be perfect :) The green things are undies hehe. Got them from  Best & Less which I usually don't go into but they were cheap and look like good quality and comfy material. I'm pretty particular about my undies.. Always go for comfort over lace and usually buy Bonds, but lately I find Bonds are really thin and don't wear great,  plus they are ridiculously priced ($15 + a pair). So we'll see how I got with these! At $5, they were a bargain anyway...  

The other Hippy thing you see there is the bag I bought! I don't have me a suitcase and didn't want a boring, grey number so I went completely opposite and got this super bright Roxy bag. It's really light and pretty much like a duffle bag on wheels, so here's hoping it wears well.


And now, today's creation -  

I was pintersting on pinterest. Which is a bad bad daily habit and I didn't take my own advice and I signed up for a pinterest account.  You should go follow me on there too if you want! Aaanyway, moral of the story - I found a cuuute little pompom owl and decided to make one too. The original tutorial is from here.


1. Wrap yarn around two pompom maker thingy bobs - I just cut these out of cardboard myself.
2. Cut yarn - slide scissors between circles and cut (I'd just like to point out that I took this photo with my knee... yup, amazing!)
3. Take length of yarn and tie tightly around the cut yarn - in between circles
4. Taadaa - Pompom! You may need to fluff it up a little by rolling it around between your palms
5. (I forgot to number it - it's the last one for those that didn't get that...) Glue on some felt beaks (well, one), eyes and footsies. And then go awww coz it's too darn cute!


Wednesday, June 15, 2011

Day 15: Covered Tin


So, Mr Peck & I collected all the tins from eclipse mints (I can't shouldn't chew gum coz I have this clicky jaw thing) we have gone through over the last couple months which added up to about 4 or so... and tonight when I wanted to use them, I couldn't find them! Typical... It seems like everything goes missing in this house, from my belt to my camera cards (don't even want to go there.. today was a day of loosing things) It makes me so frustrated!! But I know why I loose things (and I say I because it is usually me that looses things, not Mr Peck) and that's because I don't put things away after I use them.... yup, guilty as charged!

Anyway, I managed to find one at least and here's what I did to it:


Take 1 tin + 1 piece of pretty paper, glue and wrap & taadaa... pretty tin!


EDIT: I totally just realised that day 15 marks half way!! I didn't think I'd make it all this way but I have :) Looking for ward to the next 15 which hopefully I can keep up with while in in USA!

Tuesday, June 14, 2011

Day 14: Paper Cranes


The cute idea that I talked about before didn't work. Dang it! So I resorted to some paper cranes. I really like origami, such a simple way of making something cute!


 You know what I reallllly want to try? Plasti Dip! That would be so so so so cool! Maybe I'll see if I can get some and try it! The possibilities are endless!


Monday, June 13, 2011

Day 13: Web Design


Well, today I started to redesign the graphic design section of Flashbox Creative. Our website has changed a few times and I'm still not happy with it. I guess that's the downside of being a graphic designer? Or maybe that's a good thing because you don't stop learning, developing and getting better. I read a quote on pinterest that said you have to stop competing with others, and compete with yourself.. I like that. For me that means you can never be satisfied with your level of skill, you got to keep getting better and better. 

That's what I'm trying to do with my design. Since I have started studying art at college, I stopped designing and challenging myself and I feel like I've gone backwards. So I really want to keep challenging myself with design and get better. Once we come back from USA and wherever else we end up going I would love to get a design job for the challenge of it and also for the experience and of course, money :)

This is just the basics of where I want to go with my website and the photography side has a similar layout but a bit more formal. It's not up yet but all coded and ready to go, just have to get the photos in there.  Whenever I do a web project I always remember how much I love coding and web design. I just wish I had more opportunities to do it and get creative with it. I should just design & code self initiated things, but I'm a little lazy I guess. Mr Peck always tells me that I should be more of a designer and actually act like I love it. Which is true. And I am ashamed of myself for not being more of a designer. So, here's hoping I can start living it again


Sunday, June 12, 2011

Day 12: Knitted Headband


Today I went shopping with my brother & Mr Peck and got a really cute top that I can wear with tights. Been looking for something like this for a while and happy I found this one. Got it on special for $30! Sweeeet!  I'll have to do an outfit post later this week... Later we watched the latest Pirates which was actually pretty good I thought! Few odd bits in it, like the freaky mermaids... what the?! But yeah, I enjoyed it!

For my creation today I decided to knit me a head band out of this lovely orange wool that I bought for my yarnbombing. I got a few bags of wool from the op shop for like $2 and this one was in there. Pretty cool, it's chunky and an awesome colour. 

I knitted this up on size 8 needles in simple garter stitch and it was so so quick! And would be a great first project if you are just learning knitting. Let me know if you want me to tell you more! 
I am sorry for the slightly scary picture. Sleep has been avoiding me, or maybe I it and my eyes are pretty crazy.... like red & baggy and stuff... plus I don't have makeup on so yeah. Photoshop Alert!! But just ignore me and look at the headband ok? Thanks.


Saturday, June 11, 2011

Day 11: Coin purse...


Well, I have decided my sewing skills are very lacking! Which means I gots to practice!!!
Here is my creation for today... It's pretty n00bish but kind of cute.... I guess.. I want to try a few more of these to try and perfect the design.. Plus would be nice to have a zip or a purse frame thingo.
The next thing I want to try sewing is a maxi skirt. I'm thinking it should be pretty simple, just a whole lot of material :) 


Friday, June 10, 2011

Days 9 & 10: Peg Magnets & Zucchini Ricotta Cheesecake

So happy it's Friday today. Has been a looooong week. Too much work, assignments, happening! I need to write lists inside of lists and every day something new comes up. But it's Sabbath now... and no need to think about any of it! Yes!

Ok, Here is yesterday & today's creations.  I kind of did them both today but shhh, no one needs to know!


Today I made some magnetic pegs - I needed more magnets, especially useful ones that can hold stuff! So I decided to make these. I planned on spray painting them but of course, my spray paint was all used up. So I hand painted them. Didn't come up as nice as I hoped but still, they look cute. I kind of forgot my fridge was yellow so they blend in but if you've got a white fridge they would look cute :) 

If you want to make them, here are the easy peasy steps:

1. Take some wooden pegs (I stole these straight out of my peg basket!)
2. Paint any colour your heart desires
3. Take an old magnet and cut into strips
4. Glue to back of peg
5. Add any decorations you want to the front - I used embroidery thread which I had out from my friendship bracelets.


On the fridge


Today I discovered a few great blogs/websites that have stacks of vegetarian recipes! Perfect seeing I'm a vego. So I decided to try some out. Not completely creative but good enough I say! I tried the Zucchini Ricotta Cheesecake from 101 Cookbooks and Rhubarb and Raspberry Costata from Lottie + Doof.  Both turned out really well and tasted delicious! 


This recipe used dill, which I am quite excited to say that I have growing in my little pot garden. It came up and I almost pulled it thinking it was a weed but then I crushed some and realised it was dill. Then I remembered planting some seeds that I had from left over dill. It tasted so so good. If you don't use dill regularly, I suggest you try it because it is one of the yummiest herbs I think! Maybe that's because I'm part Polish.... but... doesn't everyone like dill?  Do you like dill?


Thursday, June 9, 2011

Day 8: Yarnbombing


Well, I hope you came back to see what yesterday's creation is!
It wasn't really all yesterday's work but we'll pretend it was ok?! 
So for the last semester I have been furiously knitting (in the spare moments I got) and working toward something big. ... .... . 

Problem #1: I didn't actually have that much time because I did 4 subjects plus work for another which is happening in the holidays (an art tour to USA)

Problem #2: This work was for a subject that was only half practical and the other half was theory (I wrote a 3500 word paper) so I didn't realise I wouldn't have heaps of time.

Problem #3: I started a Master of Arts this semester and that took more time.

Conclusion: Don't try and knit something huge when you have less time than you think!

So, I ended up with a whole heaps less knitting that I would have liked... But here are the results. I am generally happy with how it turned out, just would have loved to have done more!


{Photos by Mr Peck - Flashbox Creative! }


PS: I'm pretty sure my Superdry beanie is the bomb :)